Recipe (3 servings)
1.5 tablespoons coconut oil
1 tablespoon milk powder (optional, recommended)
1⁄2 tablespoon cocoa powder
2 tablespoons sweetener (maple syrup, sugar, honey, etc)
1⁄4 cup water
1⁄8 teaspoon vanilla extract (optional)
Instructions
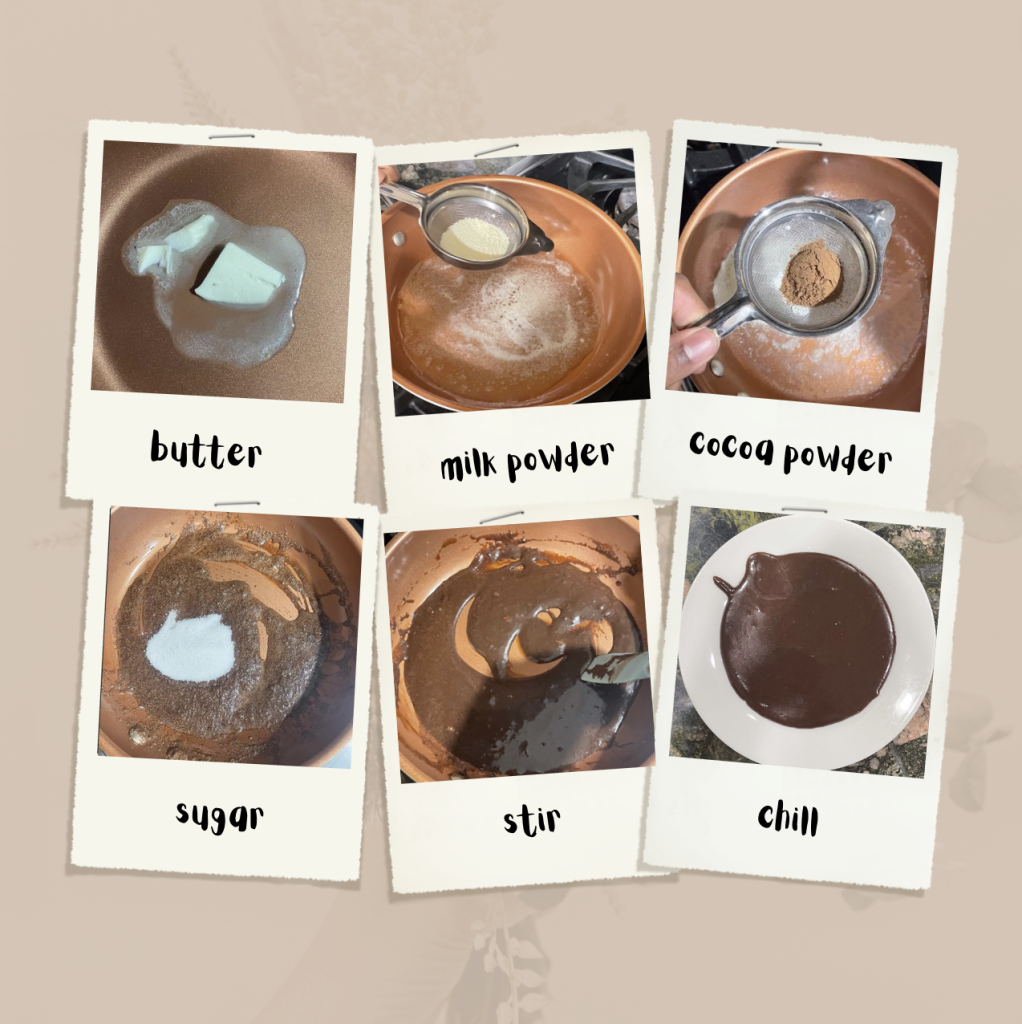
First, turn up the heat to a medium-low temperature and place a medium-sized pan on the stove. Add the water to the pan and bring it to a simmer, and then add the coconut oil. I used butter, which is one of many possible substitutions, such as cocoa butter, palm oil, and just plain old butter. Results may vary slightly depending on the product chosen, but they should all result in delicious, homemade chocolate.
Let it melt completely and occasionally stir to ensure the water and oil are well combined. At this point, add in the cocoa powder and milk powder. The milk powder is completely optional, but it makes it taste like classic milk chocolate, giving it a more creamy and lush consistency. For better results, I sifted in the cocoa powder and milk powder using a coffee filter.
Stir and completely combine the cocoa and milk powder for 2-3 minutes, then begin to add in your sweetener. I used white cane sugar, but the sweetener is up to the individual—brown sugar, white sugar, sugar-free options, maple syrup, and honey are a few among dozens.
Remove the mixture from the heat and begin to let it cool down while occasionally stirring. Once it has reached a temperature where it does not burn to the touch, optional items can be added, including nuts, vanilla extract, and peppermint extract, which are all popular options.
Begin to pour the chocolate into molds; store-bought ones or even simple containers at home will suffice. However, ensure that it is not too thick, which may make it harder to chop up and consume within multiple servings. If you are in the Valentine spirit, you can use heart-shaped molds for a special occasion or person.
The chocolate has a freezer life of four months and a shelf life of two weeks, but with the simplicity of this recipe, it can be made multiple times.
Review
After trying the first piece of my homemade chocolate, I quickly realized how rewarding the experience is. The chocolate was creamy and delicious, all with a simple four ingredients that can be found in almost every grocery store. I didn’t have molds on hand, so the shape did not come out perfectly, but the taste made up for it entirely. However, there are a few changes I would make to the recipe next time to fix a few minor flaws and better the flavor. A pinch of sea salt on the top of the chocolate before placing it in the fridge would add a nice contrast of flavors. Also, now that I have realized how easy the process can be, I would put in plenty of toppings next time and be more creative. The entire recipe is completely open-ended, whether you want to use it for Valentine’s Day or any other holiday. Get creative with it.

