
Stop me if this sounds familiar: your vision is blurring from browsing through dozens of clothing racks, you’re sweaty from trying on countless dresses, and your feet are sore just from pacing around the mall. Yet, you’re still empty handed and prom is only getting closer. If your experience is anything like mine and finding the perfect prom dress feels impossible, consider leaving the dress shops behind and creating your dress from scratch.
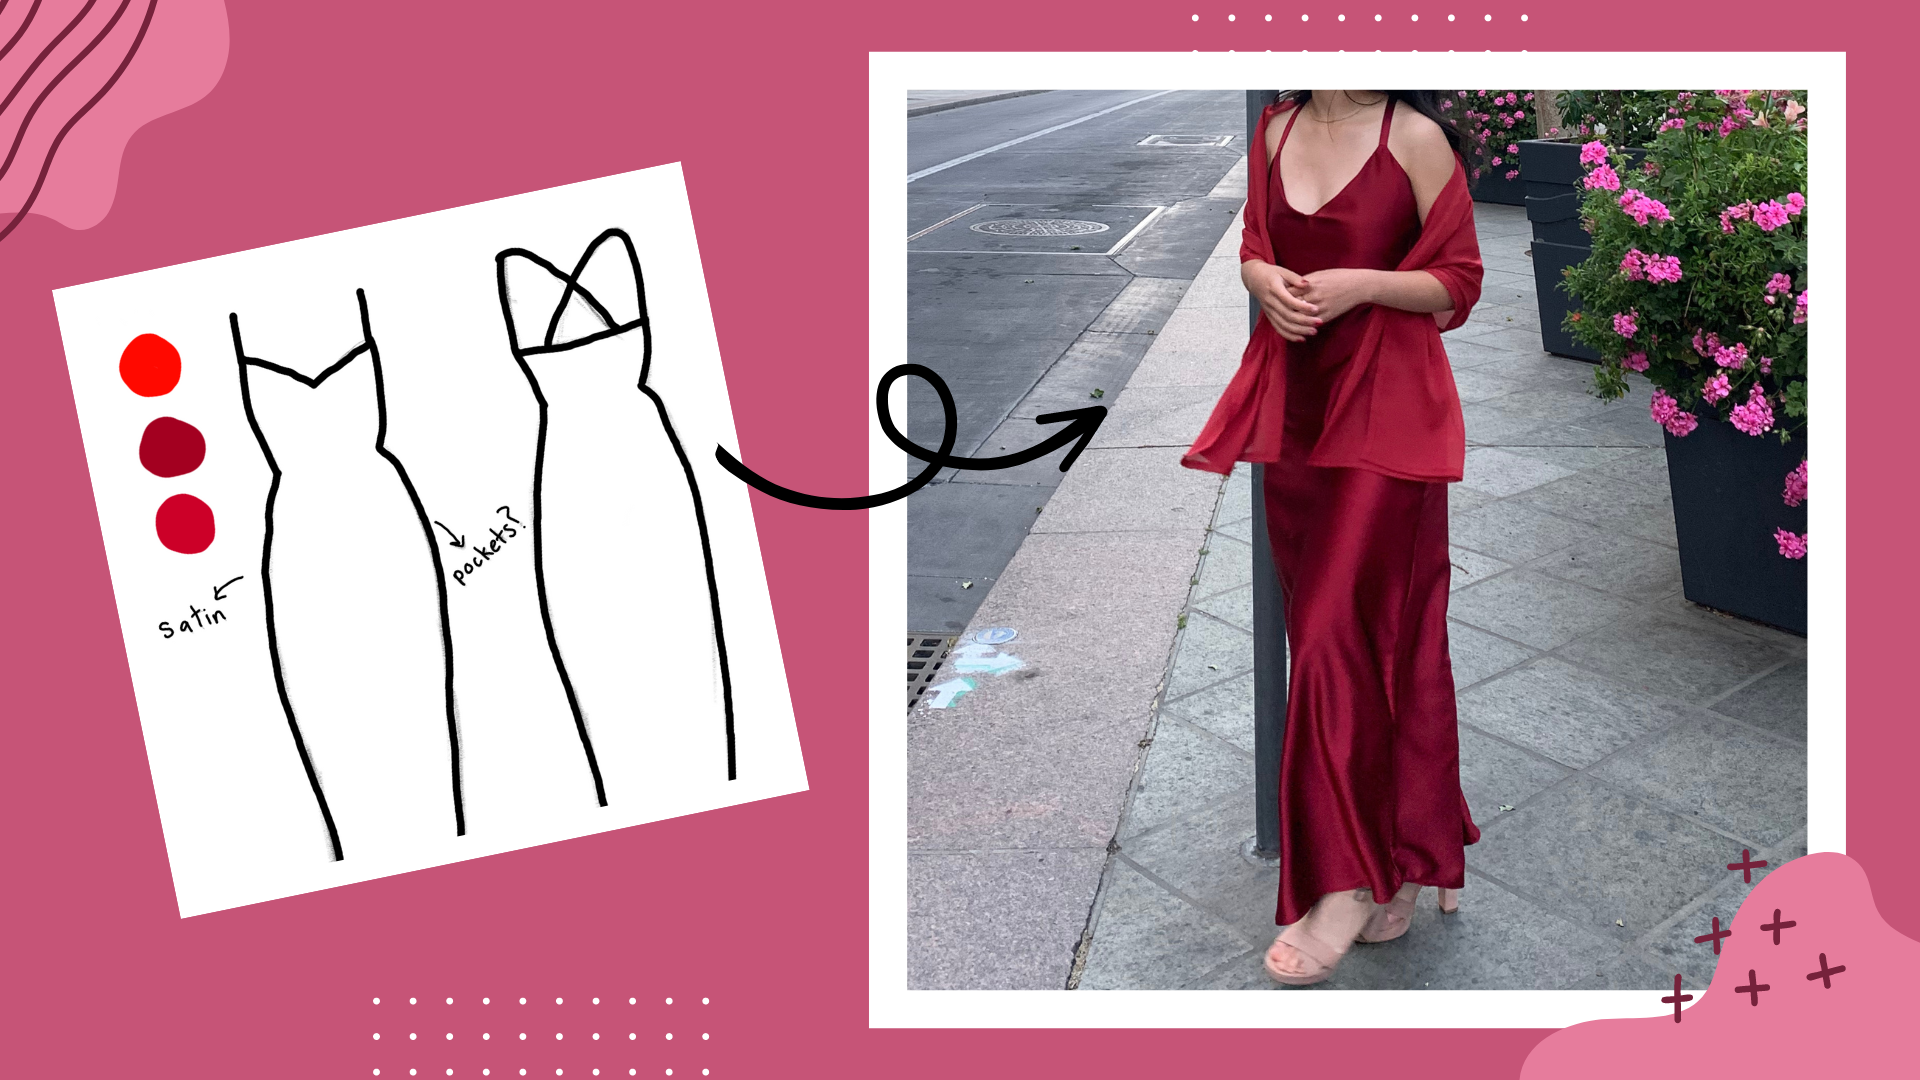
Step one is to design the dress. Pinterest is a great platform for finding and organizing ideas for projects like this, and it was one of my main resources for deciding on a design. For inspiration, I settled on a dress design with a bodice and skirt connected in one long sheet of fabric and an accompanying robe for some flair. With this simple design, I wouldn’t need to sew separate bodice and skirt pieces together. I copied the design from my inspiration photo without many adjustments since this was my first time sewing a dress. For other beginners, I’d also recommend choosing a simple design or using a pre-made pattern.
If you don’t have much experience with sewing clothing, then YouTube tutorials will be your best friend. Whenever I encountered any obstacles, I was able to find a whole array of videos to help me flesh out my pattern, figure out how much fabric to use, and teach me how to sew together the details of my dress.
The next step is to gather materials. There are also plenty of websites that sell fabric, but it can be harder to evaluate the quality of these materials online. I found that local fabric stores, like Fabrics R Us in San Jose, had the most options and the lowest prices. I followed my inspiration photo closely and bought a shiny satin and a matching sheer chiffon. As a rule of thumb, make sure to buy a little more fabric than you think you’ll need to ensure that you have enough for the entire project — this was a lesson I would learn the hard way later on in my process.
At home, I used other dresses I had on hand to cut out my pieces, tracing the bodice from one dress and the skirt from another. When I didn’t have something to trace, I tried recreating shapes I saw in YouTube tutorials. Since these freehanded shapes weren’t precise, I left a lot of seam allowance to accommodate later adjustments.
It was simple enough cutting out the dress pieces, but I realized a major mistake when I went to trace out the robe pieces: I didn’t have enough fabric. To make matters worse, the fabric was sold out when I went back to purchase more. I ended up deciding to make a simple rectangular shawl from the remaining fabric to go with my dress instead of a full robe.
Then, we’re onto the final step: sewing the dress together. I used a sewing machine to do most of the sewing, but did have to resort to hand sewing to finish off some details. I would highly recommend planning out what you’re going to sew step-by-step to avoid my mistakes. I sewed things out of order a lot, and spending time ripping stitches out made the project more time-consuming and frustrating. However, despite these obstacles, this can be the most rewarding part of the process as you see all your work come together.
Before you declare your dress complete, make sure to try it on and mark any needed adjustments with pins or tailor’s chalk. Once you finish all these little alterations, you’re officially done with your homemade prom dress!
Despite the hours of work and the challenges along the way, it is rewarding to be able to say that I created my dress by hand. My final dress may not be perfect, but it is uniquely mine.